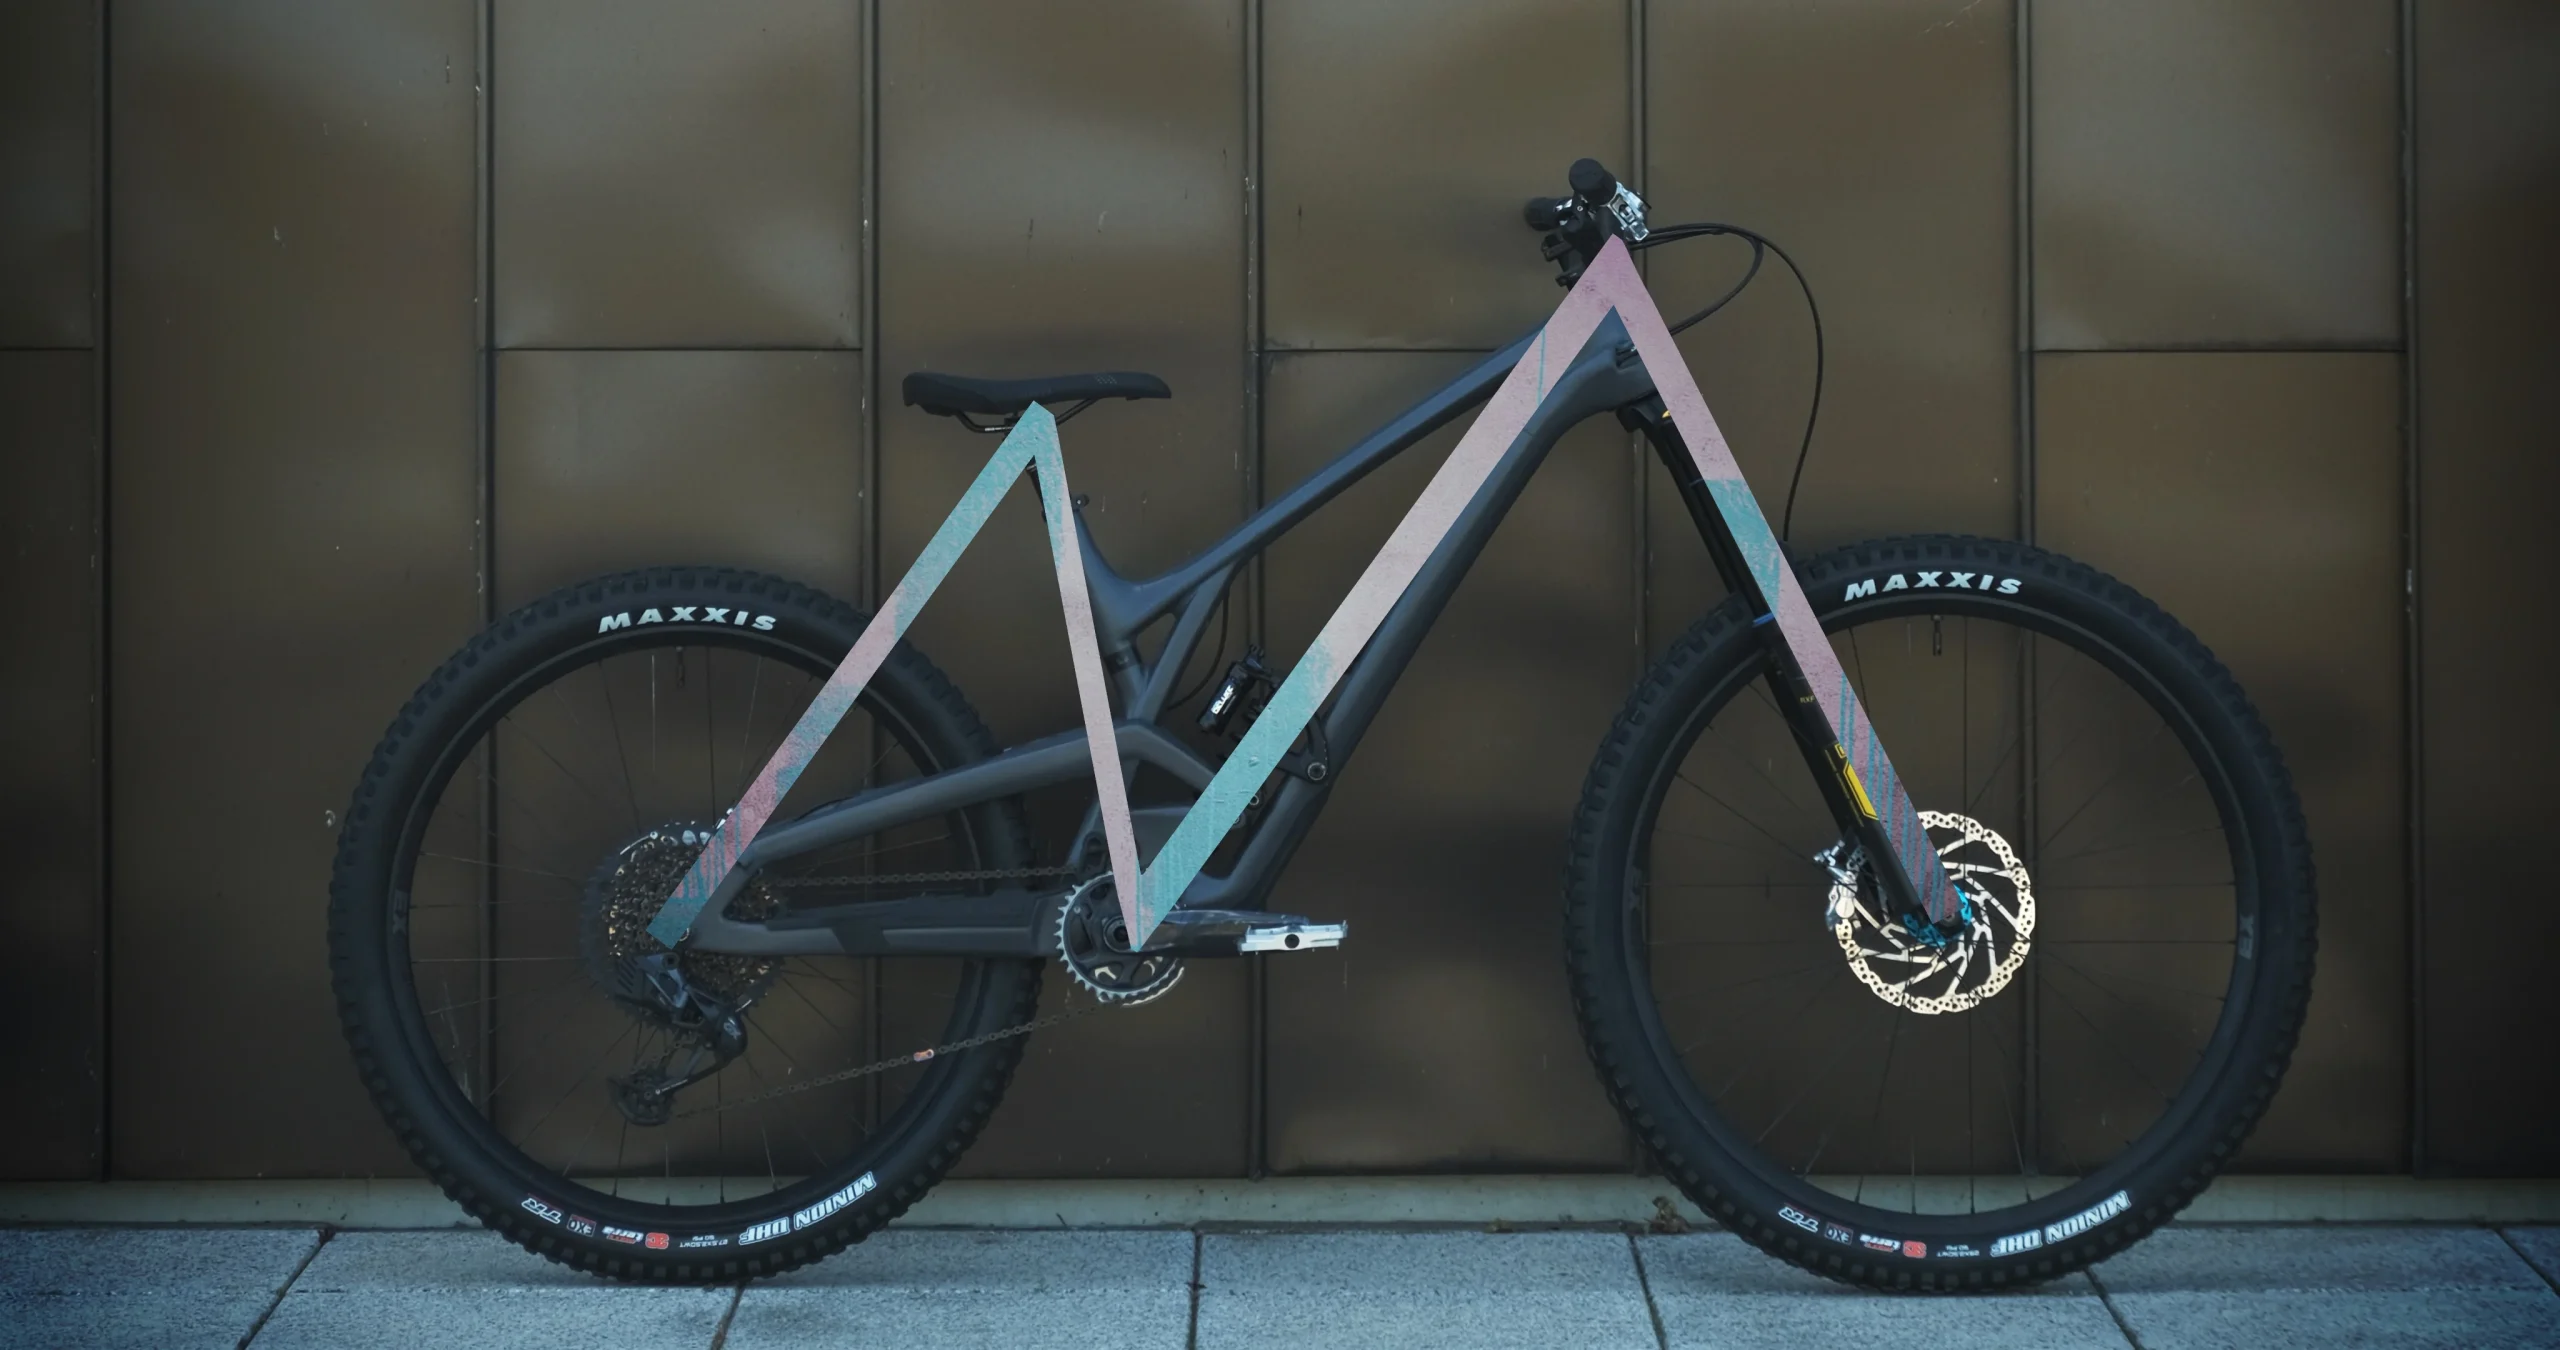
Cycling is exhilarating, but safety should always come first. Whether you’re hitting rugged trails or cruising city streets, a thorough pre-ride check can prevent accidents, extend your bike’s lifespan, and ensure a smooth ride. According to the International Bicycle Safety Association, 80% of cycling accidents can be avoided with proper inspections. To simplify this process, we use the “M-Method“—a systematic five-point checklist that follows the shape of the letter “M.” Let’s dive into each step, complete with pro tips and expanded insights.
Why Bother with a Pre-Ride Check?
– Safety First: Detect issues like brake failure or loose components before they become hazards.
– Cost Savings: Catch wear and tear early to avoid expensive repairs.
– Performance Boost: Ensure optimal shifting, braking, and suspension function.
– Peace of Mind: Ride confidently, knowing your bike is in top shape.
The “M-Method” Explained
Starting at the rear wheel, moving up to the seatpost, down to the pedals, up to the handlebars, and ending at the front wheel, this method ensures no component is overlooked.
1. Rear Wheel: The Foundation of Stability
A. Tire Pressure Check
-
Use a digital pump to inflate tires to the PSI printed on the sidewall.
-
Road bikes: 100–130 PSI | Mountain bikes: 30–50 PSI
-
Pro Tip: In cold weather, add 5–10 PSI to account for air contraction; avoid deflating hot tires immediately after riding.
-
-
For tubeless setups: Shake the wheel to check sealant levels and refresh every 6 months.
B. Brake Inspection
-
Check brake pad thickness—replace if worn below 1mm.
-
Spin the wheel to ensure it rotates freely without rubbing. If rubbing occurs:
-
Confirm the wheel is properly seated in the dropouts.
-
Adjust brake caliper alignment or seek professional help.
-
C. Noise Diagnosis
-
Lift the bike and drop it from ankle height. Rattling sounds may indicate:
-
Loose rear derailleur jockey wheels
-
Worn hub bearings (test by wobbling the wheel sideways)
-
Loose thru-axle (tighten to manufacturer’s torque specs).
-
2. Seatpost: Your Connection to Comfort
A. Secure Fit Test
-
Twist the saddle sideways to check seatpost clamp tightness.
-
Carbon frames: Apply carbon grip paste to prevent slippage (5–6 Nm torque recommended).
-
-
Inspect the saddle rails for cracks—especially after rough rides.
B. Dynamic Test
-
Simulate out-of-saddle efforts to detect flex or creaks.
-
Upgrade Tip: Use a titanium-railed saddle for durability on technical terrain.
3. Crankset: Power Transfer Hub
A. Noise Identification
-
Spin the pedals backward:
-
Chain noise: Apply bike-specific lubricant (avoid WD-40!).
-
Bottom bracket creaks: Check for water ingress or worn bearings.
-
B. Crank Stability
-
Push pedals laterally to test for play. Replace bottom brackets every 3,000 km.
-
Pro Tool: Use a chain checker—if stretch exceeds 0.75%, replace the chain.
4. Handlebars: Control Center
A. Stem and Handlebar Check
-
Tighten stem bolts to 4–5 Nm in a crisscross pattern.
-
Carbon bars: Apply friction paste and inspect for hairline cracks annually.
B. Brake Lever Test
-
Squeeze levers—the brake should engage before the lever touches the grip.
-
Hydraulic brakes: Bleed annually to remove air bubbles.
-
Cable brakes: Lubricate housings with Teflon spray for smoother action.
-
C. Shift Check
-
Ensure crisp gear changes. Sticky shifting? Replace frayed cables.
5. Front Wheel: Steering Precision
Repeat the rear wheel checks:
-
Verify tire pressure and tubeless sealant.
-
Spin the wheel to confirm brake clearance and trueness (<0.3mm radial deviation).
-
Test hub bearings: A well-lubricated hub should spin freely for 15+ seconds.
Extended Pre-Ride Checklist for Adventurers
Prepping for a long tour? Add these essentials to your kit:
| Category | Items to Check | Gear Recommendations |
|---|---|---|
| Emergency | Spare tube, patch kit, tire levers | Topeak Mini Pump |
| Tools | Torque wrench, chain breaker | Park Tool IB-3 Multi-Tool |
| Cleaning | Chain cleaner, biodegradable degreaser | Muc-Off Nano Tech Cleaner |
| Electronics | Bike light batteries, GPS signal | Garmin Varia Radar |
Maintenance Frequency Guide
– Daily: Tire pressure, brake function, quick-release tightness.
– Weekly: Chain lubrication, derailleur alignment.
– Monthly: Bearing regreasing, cable inspection.
– Seasonal: Suspension service, frame torque check.
Conclusion
The “M-Method” takes just 5–10 minutes but pays off in safety and performance. By incorporating these checks into your routine, you’ll reduce mechanical failures by 92% (UCI Technical Report). Keep a maintenance log to track adjustments and part replacements—it’s a game-changer for long-term bike health.
Now gear up, double-check that “M,” and ride with confidence! Welcome to share your own pre-ride rituals in the comments below.
Read More: How to Properly Maintain Your Electric Bike to Extend Its Lifespan


