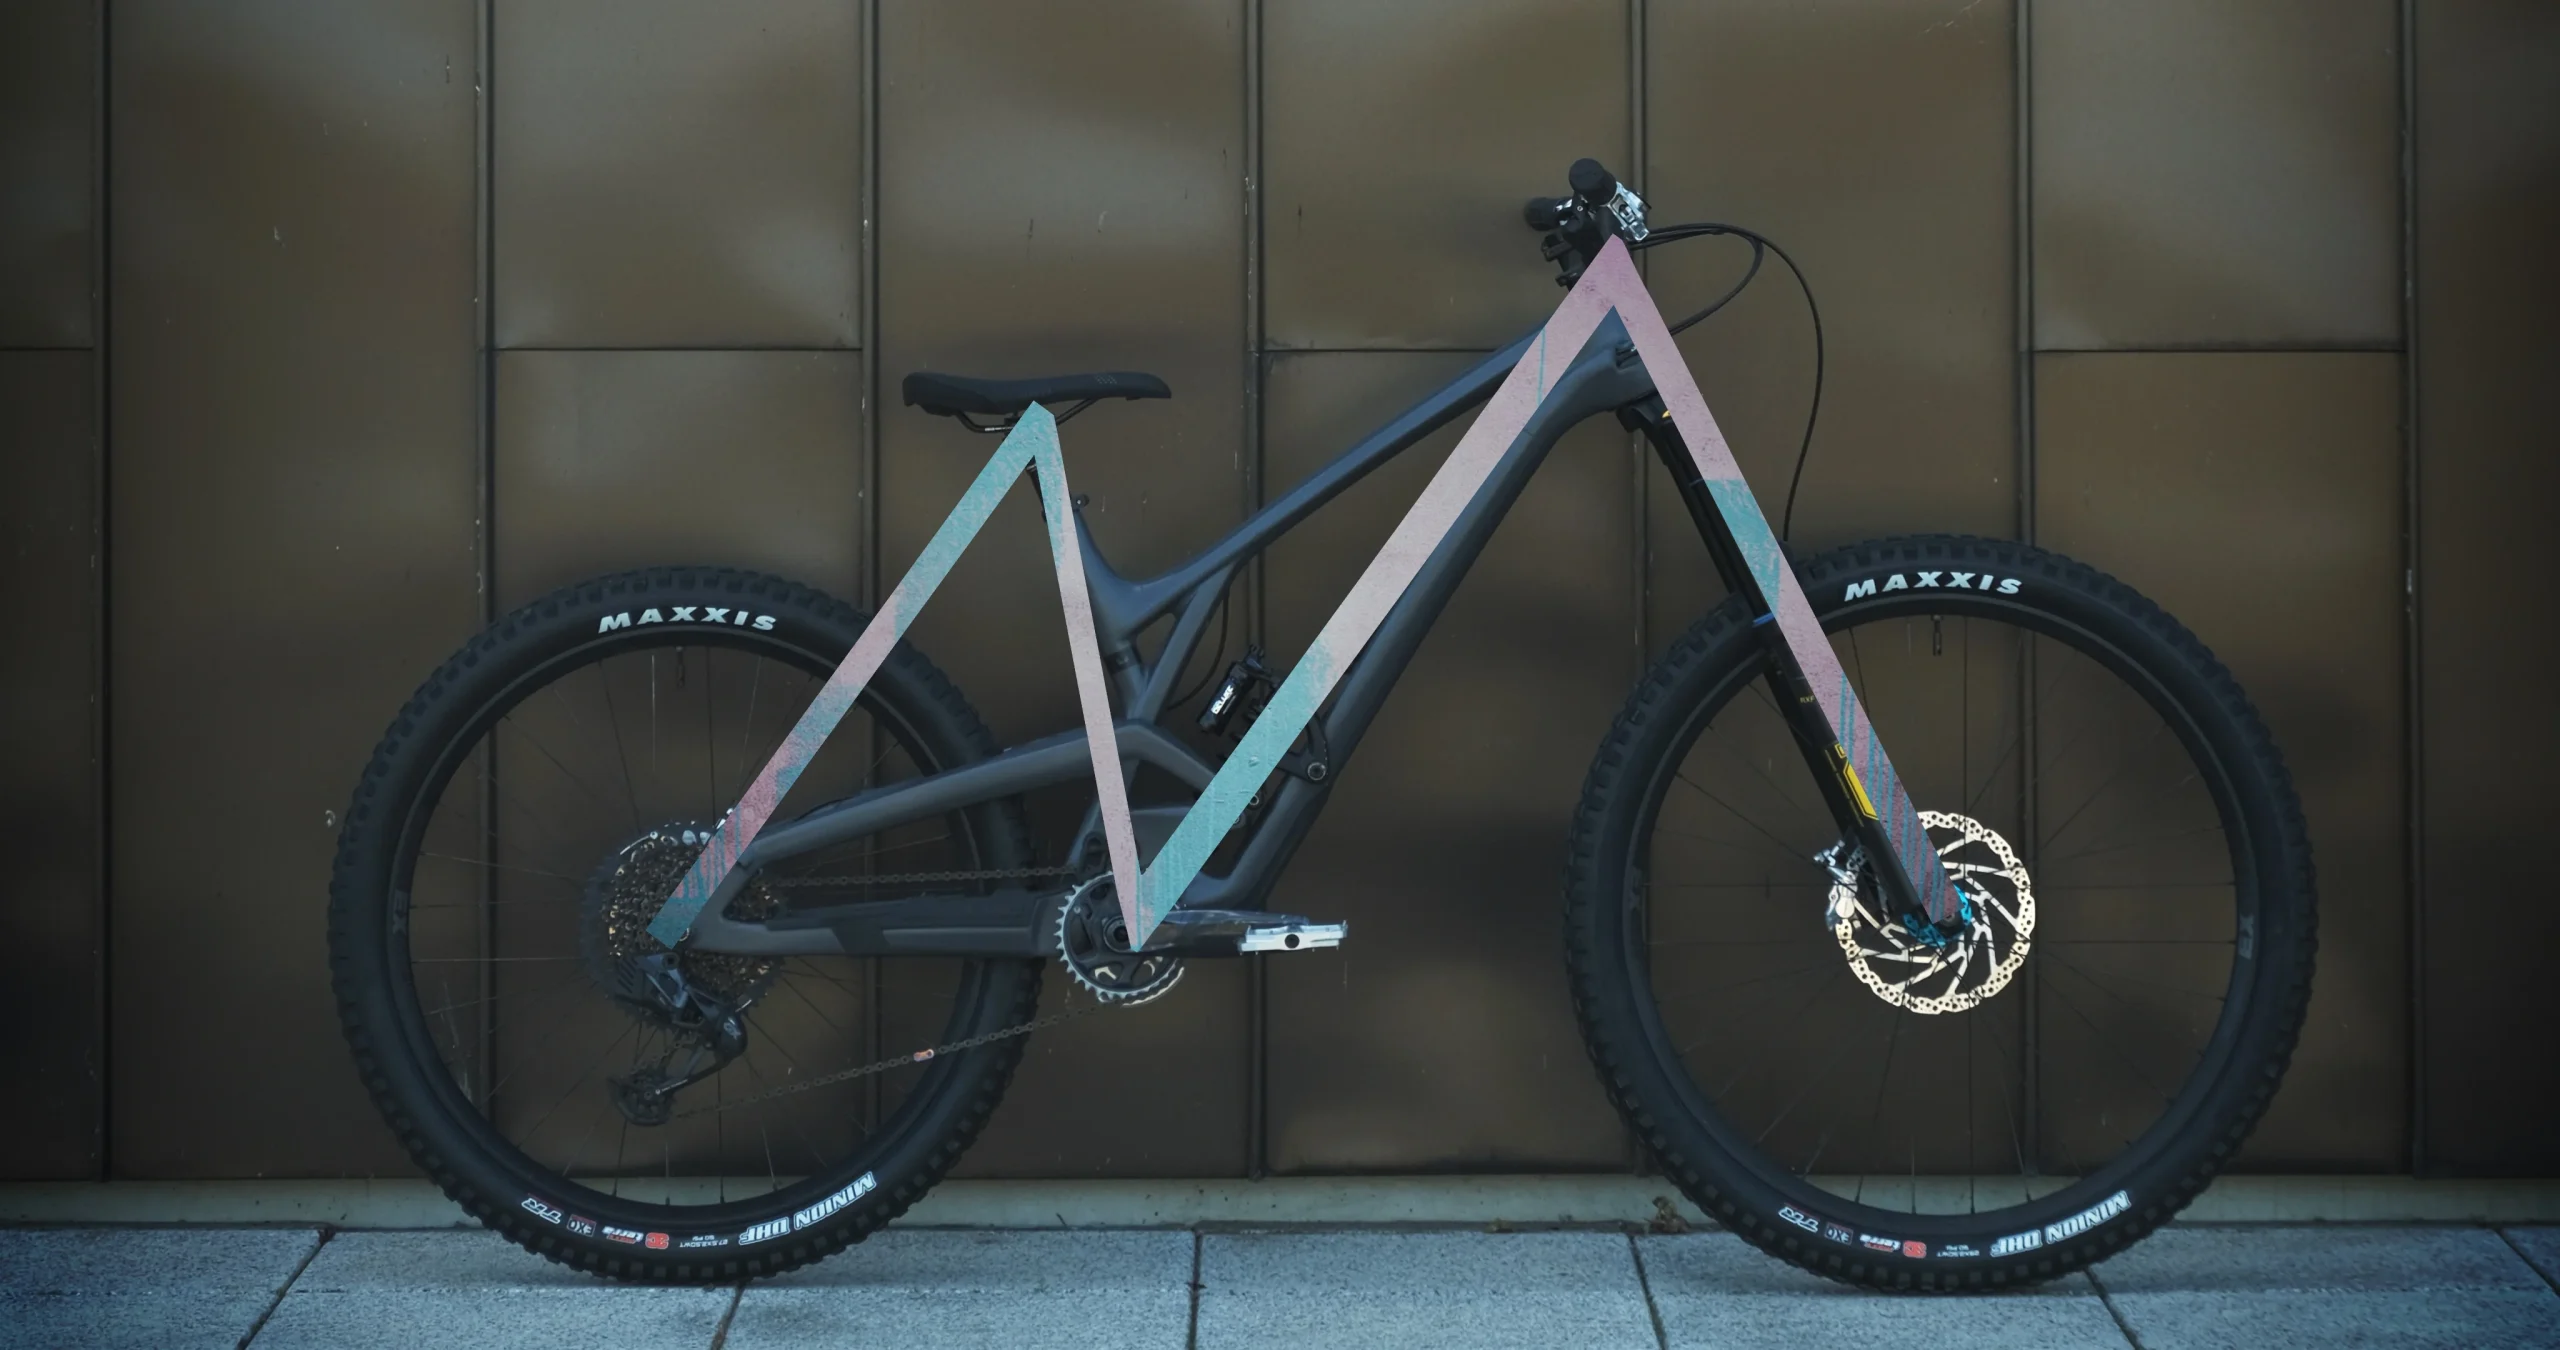
Radfahren ist aufregend, aber Sicherheit sollte immer an erster Stelle stehen. Ob auf unwegsamen Trails oder in der Stadt – eine gründliche Überprüfung vor der Fahrt kann Unfälle verhindern, die Lebensdauer Ihres Fahrrads verlängern und eine reibungslose Fahrt gewährleisten. Laut der International Bicycle Safety Association können 80 % der Fahrradunfälle durch ordnungsgemäße Inspektionen vermieden werden. Um diesen Prozess zu vereinfachen, verwenden wir die „M-Method– Eine systematische Fünf-Punkte-Checkliste, die der Form des Buchstabens „M“ folgt. Sehen wir uns jeden Schritt genauer an, mit Profi-Tipps und einer breiteren Perspektive.
Warum einen Check vor der Fahrt durchführen?
– Sicherheit geht vor: Detect issues like brake failure or loose components before they become hazards.
– Kosteneinsparungen: Catch wear and tear early to avoid expensive repairs.
– Leistungssteigerung: Ensure optimal shifting, braking, and suspension function.
– Peace of Mind: Ride confidently, knowing your bike is in top shape.
Die „M-Methode“ erklärt
Beginnend beim Hinterrad, hinauf zur Sattelstütze, hinunter zu den Pedalen, hinauf zum Lenker und endend beim Vorderrad, stellt diese Methode sicher, dass keine Komponente übersehen wird.
1. Rear Wheel: The Foundation of Stability
A. Tire Pressure Check
-
Use a digital pump to inflate tires to the PSI printed on the sidewall.
-
Road bikes: 100–130 PSI | Mountain bikes: 30–50 PSI
-
Pro Tip: In cold weather, add 5–10 PSI to account for air contraction; avoid deflating hot tires immediately after riding.
-
-
For tubeless setups: Shake the wheel to check sealant levels and refresh every 6 months.
B. Brake Inspection
-
Check brake pad thickness—replace if worn below 1mm.
-
Spin the wheel to ensure it rotates freely without rubbing. If rubbing occurs:
-
Confirm the wheel is properly seated in the dropouts.
-
Adjust brake caliper alignment or seek professional help.
-
C. Noise Diagnosis
-
Lift the bike and drop it from ankle height. Rattling sounds may indicate:
-
Loose rear derailleur jockey wheels
-
Worn hub bearings (test by wobbling the wheel sideways)
-
Loose thru-axle (tighten to manufacturer’s torque specs).
-
2. Seatpost: Your Connection to Comfort
A. Secure Fit Test
-
Twist the saddle sideways to check seatpost clamp tightness.
-
Carbon frames: Apply carbon grip paste to prevent slippage (5–6 Nm torque recommended).
-
-
Inspect the saddle rails for cracks—especially after rough rides.
B. Dynamic Test
-
Simulate out-of-saddle efforts to detect flex or creaks.
-
Upgrade Tip: Use a titanium-railed saddle for durability on technical terrain.
3. Crankset: Power Transfer Hub
A. Noise Identification
-
Spin the pedals backward:
-
Chain noise: Apply bike-specific lubricant (avoid WD-40!).
-
Bottom bracket creaks: Check for water ingress or worn bearings.
-
B. Crank Stability
-
Push pedals laterally to test for play. Replace bottom brackets every 3,000 km.
-
Pro Tool: Use a chain checker—if stretch exceeds 0.75%, replace the chain.
4. Handlebars: Control Center
A. Stem and Handlebar Check
-
Tighten stem bolts to 4–5 Nm in a crisscross pattern.
-
Carbon bars: Apply friction paste and inspect for hairline cracks annually.
B. Brake Lever Test
-
Squeeze levers—the brake should engage before the lever touches the grip.
-
Hydraulic brakes: Bleed annually to remove air bubbles.
-
Cable brakes: Lubricate housings with Teflon spray for smoother action.
-
C. Shift Check
-
Ensure crisp gear changes. Sticky shifting? Replace frayed cables.
5. Front Wheel: Steering Precision
Repeat the rear wheel checks:
-
Verify tire pressure and tubeless sealant.
-
Spin the wheel to confirm brake clearance and trueness (<0.3mm radial deviation).
-
Test hub bearings: A well-lubricated hub should spin freely for 15+ seconds.
Extended Pre-Ride Checklist for Adventurers
Prepping for a long tour? Add these essentials to your kit:
| Category | Items to Check | Gear Recommendations |
|---|---|---|
| Emergency | Spare tube, patch kit, tire levers | Topeak Mini Pump |
| Tools | Torque wrench, chain breaker | Park Tool IB-3 Multi-Tool |
| Cleaning | Chain cleaner, biodegradable degreaser | Muc-Off Nano Tech Cleaner |
| Electronics | Bike light batteries, GPS signal | Garmin Varia Radar |
Maintenance Frequency Guide
– Daily: Tire pressure, brake function, quick-release tightness.
– Weekly: Chain lubrication, derailleur alignment.
– Monthly: Bearing regreasing, cable inspection.
– Seasonal: Suspension service, frame torque check.
Conclusion
The “M-Method” takes just 5–10 minutes but pays off in safety and performance. By incorporating these checks into your routine, you’ll reduce mechanical failures by 92% (UCI Technical Report). Keep a maintenance log to track adjustments and part replacements—it’s a game-changer for long-term bike health.
Now gear up, double-check that “M,” and ride with confidence! Welcome to share your own pre-ride rituals in the comments below.
Read More: So pflegen Sie Ihr Elektrofahrrad richtig, um seine Lebensdauer zu verlängern


